اعضاء متميزون

الاثنين، 31 أكتوبر 2011

墨尔本之旅

每次都听同事朋友提起墨尔本是个好吃好买的城市,来了澳洲七年,这还是第一次到墨光。次我和老公乘周末来走走看看, 主要目的是到处觅食。在来墨本之前,同事都很踊的把他们认为好吃的去处写下来给我,这样我便可以在短短的时间内享尽次城的美食。相信很多人都对Gordon Ramsay这个满口“粗话“ 的名厨很认识。我老公很喜欢看他的Kitchen Nightmare,连重播都会很感兴趣的看。这次算是有机会尝尝大厨旗下的Maze餐馆的美食。以前,看到Ramsay在节目中不断的骂人,我立志要尝尝他的手艺,看看他为什么一直骂别人的厨艺差劲。吃了他那餐饭后,我这才对他服了,难怪他整天乱骂那些不长进的厨师,原来他的确是有他过人之处。餐厅当晚的菜单是以春天菜肴为主题,每一道菜 都非常精致独特,服务也很周到,我们俩都对那个晚餐是极度满意。


同事告示我她几年前上了Jamie Oliverfifteen厅用餐,她觉得我一定要去尝尝。她叫我打电话去预约,说是还有Jamievoice message。我当然有打电话去预约啦,但是没有Jamie的声音,失望了。照着定的时间fifteen,很期待当天的晚餐,餐号是115连门牌也和餐名有相关系,害!好笑的是,怎么找都没看到家餐啊。那个门牌的餐馆是叫做 The Cat in the Kitchen。我们两个都不敢进去那家店,就到对面餐厅打听一下究竟。餐厅老板很打趣的笑说Jamie回英国去了,不做了。之前也觉得奇怪在 fifteen的网站只可以看到它旗下有3间分行London, Amsterdam & Cornwall),但就已删除了在墨尔本的这一家。我们霎时不知怎么是好,老公说如果不是Jamie的就别上了。看到挂在外面的餐牌不怎么吸引就打了退堂鼓。看到fifteen对面这家pasta餐厅人潮很旺,就问老板可以让两个位子给我们吗?就这样我们和Jamie的约会泡汤了。据说,The Cat的大厨还是Jamie的大厨啦,我很“鸡婆”的乘等食物来的时候,摸进去The Cat看一看究竟,餐厅很特别也很有风格,但是生意就只是普普通通而已。

老实说,墨尔本市中心的小巷(lane way)到处都是café,简直是可以走到那里吃到那里就是了。喜欢烘焙的朋友,不要错过了在306 Little Collin St Laurent Bakery。最”衰“就是我老公,当天竟然饱不要吃蛋糕,我只好叫了仅仅的一个。因为店是注册商标不准拍照,所以只可以拍到我吃的那个罢了。Larent这家店在悉尼也有分行,柏斯的朋友就没福享用了。http://www.laurent.com.au/retail.html


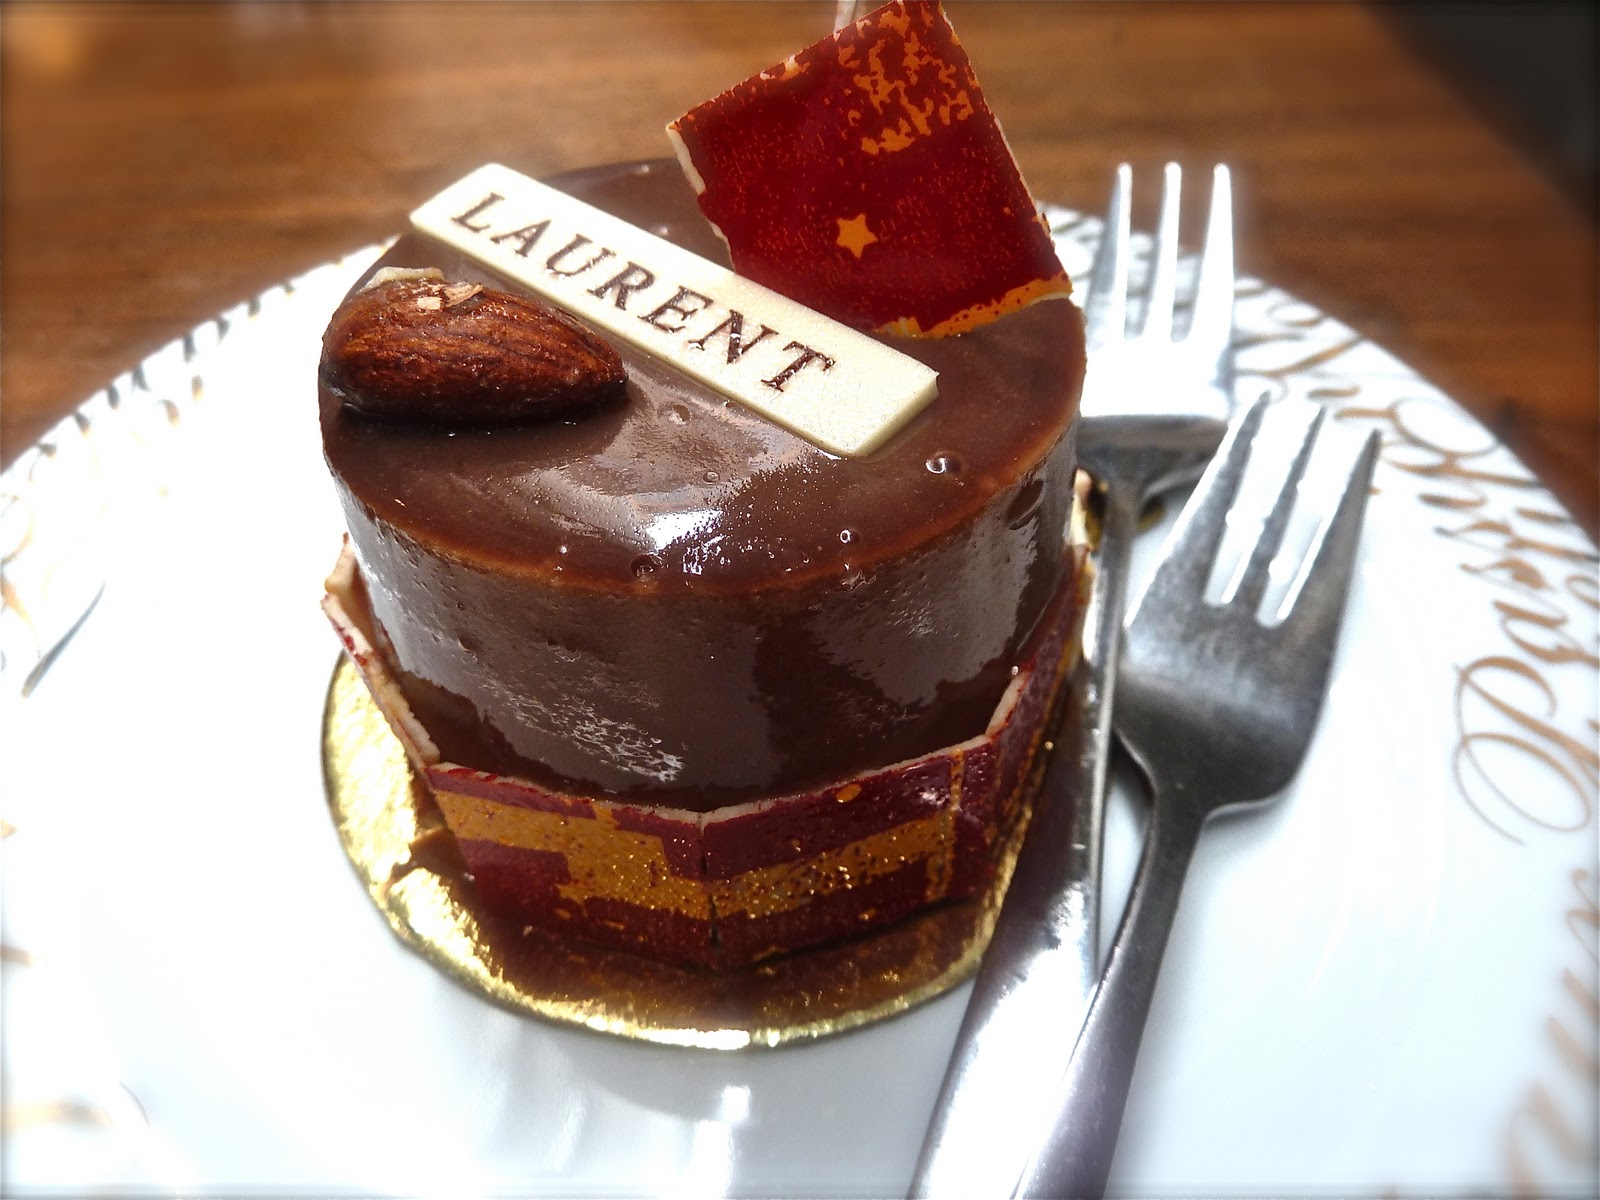
叫了一个Bahai-A combination of exotic fruits & chocolate mousse over a nougatine & nuts choc flourless biscuit。

再来,想介绍一家很特别的café叫Hopetoun Tea Rooms。 在逛着 著名的Block Arcade时,看到排了很长队在等位子的一家café。很好奇的去探讨一下,果然摆设在橱窗的一个个蛋糕非常的精致特别,难怪排了长龙。我当天没“kiasu”跟着队,是过了一天才在off peak时段摸上门的。但也是排了五分钟的队。我们才坐下,服务员就来叫我们搬到另一张比较小的位子,还问我们排队了没有。我老公气了,想要走了,还好老板娘很和气过来打交道,说是新服务员不懂,很不好意思让我们搬来搬去。在我走之前还特地打包了店里的macarons给我们,让我惊觉当地的服务水准和柏斯的服务态度简直是两极啊!
http://www.hopetountearooms.com.au/


 喜欢烘培的朋友我想也应该喜欢到处寻觅可爱实用的烘培工具及装饰品,在这里介绍一下我喜欢的几间店,如果有到墨尔本不妨到店里逛逛咯:

1rap products 345 Collins Street Melbourne
3Victoria Market – 凌朗满目的食材,真是让我觉得住在墨尔本的人多幸运啊
柏斯的Fremantle Market怎么相比之下变得渺小了这么多呢!

之前做了失败的可颂一直耿耿于怀到底可颂里面的组织是要怎样的才对啊!这是Ramsey餐厅的可颂,快快拍了下来,这因该是对的可颂的样子了吧!


الأربعاء، 26 أكتوبر 2011

Yam Layer Cake


了会再来一个layer cake的啦!是这样的,上个礼拜就和姐姐好了今天去他家做个芋layer cake。这个也是跟之前的班兰layer cake一起学的。但是记得那次学了过后,就只做了失败的一次,之后就只专攻班兰的口味的。我其实已买好了芋头的但是姐姐说她可以买到紫色的芋头,所以就很高兴的搭她买了。她住的地区比较方便,什么capalang都可以买得到,所以可以每次搭买东西,然后,她又会顺便送很多没有搭买的。哈哈,很好很好!做完今天的layer cake我的厨房要暂时关闭一个星期。 乘Queen’s Birthday假期,明天要出门走走了。我到现在还完全没有收拾我的行李呢!我还是乘老公还没回来之前快去收拾一下吧!一个礼拜后再见!


芋香蛋糕
材料A:
4 蛋白
1/4tsp 塔塔粉
50g 幼糖

材料B:
4 蛋黄
30g 幼糖
60ml 粟米油
4.5 tbs 牛奶
1tsp 芋香精
1tsp 紫色素

材料C:
120g 特幼粉

注明: 因为我用8寸方模做这个蛋糕,以上蛋糕体只可形成2片蛋糕,所以我用了双倍以上的材料烤了两个39cmx26cm的蛋糕。

做法:
1) 将材料A至硬性.
2) 将材料B的幼糖加入蛋黄里,再依序加入粟米油及牛奶拌均匀.
3) 1/3的蛋白倒入蛋黄糊内,接着入材料C,拌匀.
4) 再加入剩余的蛋白轻轻搅拌均匀.
5) 将拌好的面糊,倒入39cmx26cm蛋糕卷烤模,放入预热烤箱以180度烘烤15.
6) 蛋糕蛋糕出炉, 移至网架, 撕开4蛋糕.
7) 等蛋糕冷却后,将蛋糕切47.5寸方形的蛋糕. (我只用了3片来装饰蛋糕)


芋头加椰酱

500ml 浓椰浆
600ml
12 tsp
12 tsp芋香精
90g Hunkwee
125g
2tsp 燕菜粉
400g芋头(蒸熟,拌成芋泥)

做法:
1) 水,芋泥,芋香精,  ,  ,  绿豆粉和菜燕粉一起用拌器拌匀, 慢火煮至稠及泡泡即可.

蛋糕:
1) 将煮好的芋头加椰酱(大概会有1kilo,分4份,一份是250g) 倒入第一份250g到模里,上一片蛋糕。
3)倒入第二份250g芋头加椰酱,再上第2片蛋糕, 重复第三份250g芋头加椰酱上第3片蛋糕。最后上第四份250g芋头加椰酱
4) 蛋糕冷却到室温后,放入冰箱冷藏至少三个即可享用.

士:在装蛋糕前,把蛋糕模上少水,这样蛋糕比容易脱模。


Yam Sponge Cake

Ingredients
 (A)
4 egg whites
1/4 tsp cream of tartar
50g caster sugar

(B)
4 egg yolks
30g caster sugar
60ml corn oil
4.5 tbs milk
1tsp yam essence
1tsp purple colour

(C)
120g cake flour (sift)

Methods:
1.) Beat egg whites with sugar and cream of tartar until stiff (A)
2.) Mix egg yolks, oil, sugar, milk , yam essence, purple colouring (B).  Stir until well mixed and  smooth.  
3.) Fold 1/3 of (A) into (B). Fold in sifted (C).
4.) Fold in the rest of the (A) into the mixture.
5.) Pour batter into a prepared cake pan (39cm x 26cm) and spread evenly with a scraper. Bake in preheated oven 180C  15-18 minutes or until golden.
6.) Leave the cake on a wire rack to cool.
7) Cut the cake into 3 x  7.5” squares.


Yam Agar Agar
Ingredients:
500ml coconut milk (from 2 coconuts)
600ml water
½ tsp salt
½ tsp yam essence
90g Hunkwee flour
125g sugar
1tsp agar agar powder
400g yam (steam and mashed)  I used the purple yam to get the original purple color, if not add in some purple coloring to get the intended color.

Method:

1.) Mix all ingredients in a big pot on a medium to low heat until thickened and cooked. The mixture will start to bubbles.


To Assemble:
1.) Divide the yam agar-agar into 4 portions (you will have about 1kg  and divide into 4x 250g)
2. )Pour the first 250g agar-agar into 8”mould, and top one layer of cake.
3.)Top the 2nd portion of agar-agar onto the cake and spread evenly and top with another slice of cake. 4.) Continue the same process with the 3rd layer of cake.
5.) Lastly, top with the 4th portion of agar agar and spread evenly.
5.) Leave the cake at room temperature until cool completely and refrigerate for at least 3 hours before serving.

Tips: spray some water into the mould before assemble( not too much). This allows the cake to come off the mould easily.


蛋糕食参考:The Joy of Baking by Bake With Yen (KL) Sdn Bhd


الاثنين، 24 أكتوبر 2011

Pandan Layer Cake


最近Pandan Layer Cake刮得很强,竟然吹到我都受不了。昨天在Eileenblog里告诉她,我先吃她的,等多两天我做了再请她吃。好了,现在总算可以应验承诺。这个蛋糕我在马六甲一间叫旺源烘培店学过,但那是很久很久以前的事了,连当时抄下的蛋糕食谱都不见了。打了电话给姐姐看她有没有复印版,她果然有也!哇,想不到事隔多年,她竟然还有珍藏着。她把食谱寄了在facebook给我,但是不知怎么搞的我收不到。不管啦,我就用跟旺源买的一本很旧的食谱里找到的这个Pandan Layer Cake 食谱试一试。其实,也参阅了其他的食谱,做法都大同小异。我相信只要蛋糕整体不要太甜,班兰层次均匀就是一个好看又好吃的Pandan Layer Cake了。在做蛋糕体时,选用了长形模因为这样可以省掉横行却蛋糕的麻烦。我的手会sengek,却横行蛋糕常会有不均匀的状态出现。用蛋糕卷模做出来的蛋糕都会是高低均匀,所以不用量蛋糕的高低量到头痛。跟Jane约好了星期三到他家去,会再来一个layer cake。


蛋糕

材料:                          Ingredients:
(A)                               (A)
4 蛋白                      4 egg whites
1/2tsp 塔塔粉             1/2 tsp cream of tartar
70g 幼糖                     70g caster sugar 

(B)                               (B)
4 蛋黄                     4 egg yolks
50g 幼糖                    50g caster sugar
125ml 粟米油           125ml corn oil
80ml 椰浆                  80ml coconut milk
½ tsp 盐                     1/2 salt
½ tsp 班兰paste         1/2 tsp pandan paste

材料
(C)                               (C)
120g 特幼粉              120g super fine flour (sifted)

做法/ Method:
1) 将材料A至硬性.
Beat A until stiff peak form

2) 将材料B的幼糖加入蛋黄里,再依序加入粟米油及椰浆拌均匀.
Add caster sugar in B into egg yolk and mix well. Follow by mixing in corn oil and coconut milk.

3) 1/3的蛋白倒入蛋黄糊内,接着入材料C,拌匀.
Fold 1/3 of egg white in (1)  into egg yolk batter (2) then fold in (C).

4) 再加入剩余的蛋白轻轻搅拌均匀.
Fold in the rest of 2/3 egg white.

5) 将拌好的面糊,倒入30x21cm寸烤模,放入预热烤箱以180度烘烤15-18.
Pour the batter into a lined (without grease) 30x21cm swiss roll pan. Bake in preheated oven 180C for 15-18 minutes.

6) 蛋糕蛋糕出炉移至网架撕开4蛋糕热.
Remove cake from the oven and cool the cake on a wire rack.

7) 等蛋糕冷却后,将蛋糕切3.
Cut the cake into 3 pieces (rectangle shape).

兰酱 Pandan Kaya:
材料 Ingredient:
550g 浆                 550g thick coconut /coconut cream
450g 水                         450g water
1/2tsp 班兰paste           1/2 tsp pandan paste
70g 幼糖                       70g caster sugar
100g 绿豆粉 (青色)     100g Hoen Kwee powder
1/2 tsp 盐                      1/2 tsp salt
2tsp 菜燕粉                  2 tsp agar agar powder

做法:
1) ,水,paste青色绿豆粉和菜燕粉一起拌器拌匀慢火煮至稠及泡泡即可.
Mix all ingredients in a big sauce pan and mix well. (I find it easy to use a hand balloon whisk to mix and stir the pandan kaya paste as this will give you a smoother texture). Cook the mixture over low heat, stir constantly until mixture starts to bubble.

蛋糕 Decorating:
1) 将煮好的班兰酱(大概会有1kilo,分4份,一份是250g)。 倒入第一份250g酱到模里,铺上一片蛋糕。
You will get about 1 kilo cook pandan kaya. Divide them into 4 portions, 250g each. Pour the first 250g into a loaf pan (I used a 20.5cm x 10.5cm x 10cm loaf pan). Then lay with a piece of cake.

2)倒入第二份250g班兰酱,上第2片蛋糕重复第三份250g班兰酱,上第3片蛋糕。最后铺上第四份250g班兰酱。
Pour the 2nd 250g pandan kaya on top of the cake and then lay the second layer of cake. Repeat this with the 3rd layer. Lastly pour in the 4th 250g on the top of the cake. Smooth the kaya with a scraper.

3) 蛋糕冷却到室温后,放入冰箱冷藏至少个四即可享用.
Leave the cake to cool to room temperature then refrigerate at least 4 hours or overnight.

贴士:在装饰蛋糕前,把蛋糕模喷上少许水,这样蛋糕比较容易脱模。
Tips:It is easier to remove the cake from the pan if you spray some water into the loaf pan before laying the kaya and cake.

蛋糕食谱参考:The Joy of Baking by Bake With Yen (KL) Sdn Bhd


الأحد، 23 أكتوبر 2011

螺旋咖哩角 ( Curry Puff)


“我终于成功做出这个螺旋咖哩角了!!”螺旋角我已差不多将近要放弃了,今天又不死心再度挑螺旋角得去年,拿了姐姐的食谱做了几次都是没有螺旋现过。每次失,就会打电话给苦,她每次同情我的遭遇,就个有做吗?那个有捏对吗?有啦,有啦,都有啦,但是咖哩角都是平平无奇。去年圣诞期间,我打算咖哩角凑款医院, 还劳烦姐姐帮我做了50份皮,结果呢。。炸出来的是normal curry puff. 所以这个东西隔了很久都不要再做了。

今天的挑战简单是要做两次才月明!食可以做14个,先炸了5个试试,很气,又是错了。不甘愿,再去youtube看做法,又再开工。成了成了!很高兴的拿着层层的咖哩角去向老公炫耀。他一帮我吃掉了六个,一面告诉我“very nice very nice!”今天上的是让我苦等了已久的螺旋咖哩角

螺旋咖哩角食谱 Jane's Corner的螺旋咖哩角

Jane在她的blog里也share了一个很好的youtube制作片段Video


我每次都用这个工具来做咖哩角,今天是用它来测试咖哩角的尺时大小,这是初学者才用的方法!呵呵!


因为我是用左手,学了很久才领悟到我应该是要从另一个方向开始才会比较顺手。


بحث.في هذه المدونة الإلكترونية

المشاركات الشائعة